Tuna Melt Patties Recipe
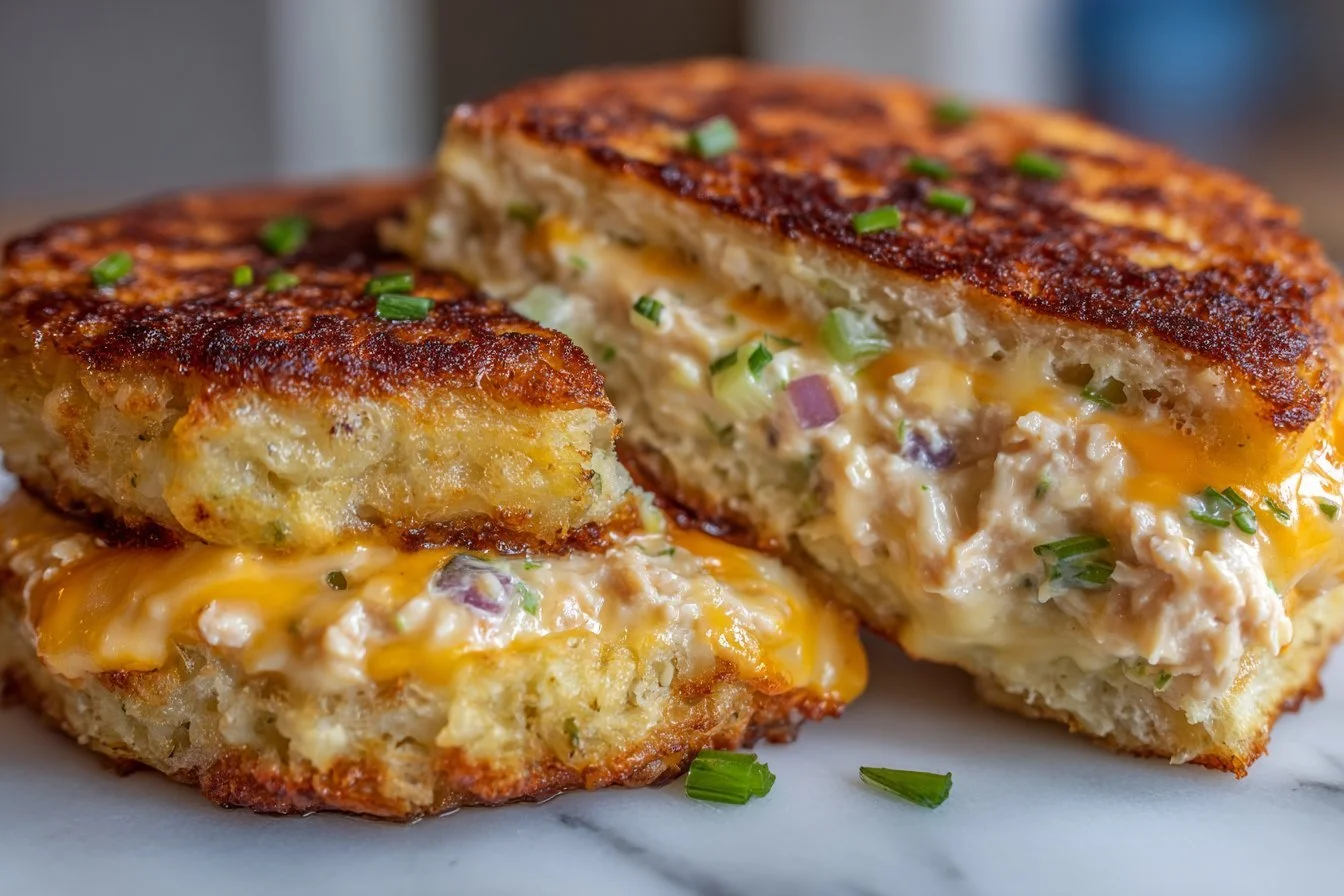
I first made these tuna melt patties on a rushed weeknight and they instantly became a comfort-food shortcut in my rotation: crispy golden patties, melty cheese inside, and no fuss. This recipe turns pantry staples into a sandwich-worthy centerpiece in under 20 minutes of active work — great for quick lunches, kid-friendly dinners, or packing for a picnic. If you like the idea of a hand-held tuna melt without the mess of a full sandwich, you’ll find these patties addictive and easy to adapt to your pantry. For another handheld tuna idea, try this tuna melt wrap that’s perfect for on-the-go lunches.
Why you’ll love this dish
These Tuna Melt Patties are quick, budget-friendly, and universally appealing. Canned tuna keeps costs low and prep time minimal, while breadcrumbs and egg bind everything into sturdy, fryable patties that crisp up in a single skillet. They’re versatile — serve on toast for a classic melt, tuck into an English muffin, or plate with a salad for a lighter meal. They also travel well for packed lunches and are easy to scale up for a family.
“I didn’t expect something so simple to taste this indulgent — golden and crispy outside, gooey cheese inside. Weeknights have never been easier.” — a repeat eater of these patties
How this recipe comes together
Overview: Drain the tuna, mix it with binder and seasonings, fold in cheese and scallions, form patties, and pan-fry until golden and crisp. Total hands-on time is about 10–15 minutes; cooking is 3–4 minutes per side. You can finish under a broiler for an extra melty top if serving as an open-faced melt.
- Step 1: Combine drained tuna with breadcrumbs, mayo, egg, mustard, and seasonings.
- Step 2: Add shredded cheese and green onions, then shape into 4–5 patties.
- Step 3: Pan-fry in butter over medium heat until browned and cooked through.
- Step 4: Serve hot on toasted bread or with a salad; optional broil for extra cheese.
What you’ll need
- 2 cans (5 oz each) tuna, drained
- ½ cup breadcrumbs (plain or panko for more crunch)
- ¼ cup mayonnaise (use full-fat for richness)
- 1 egg (large)
- 1 teaspoon Dijon mustard
- ½ teaspoon garlic powder
- ½ teaspoon onion powder
- ½ teaspoon salt
- ¼ teaspoon black pepper
- ½ cup shredded cheddar cheese (or Swiss for milder flavor)
- 2 tablespoons green onions, chopped
- 1 tablespoon butter (for cooking)
Notes and substitutions: swap panko for regular breadcrumbs for a lighter texture, or use Greek yogurt instead of mayo for tang and fewer calories. For a gluten-free version, use gluten-free breadcrumbs or crushed gluten-free crackers.
Directions to follow
- Prepare the tuna: Open and drain both cans thoroughly, then flake the tuna into a large mixing bowl.
- Combine binders and seasonings: Add breadcrumbs, mayonnaise, egg, Dijon mustard, garlic powder, onion powder, salt, and pepper. Mix until evenly combined; the mixture should hold together when pressed.
- Add cheese and scallions: Fold in shredded cheese and chopped green onions. Stir gently to distribute.
- Shape the patties: Form the mixture into 4–5 evenly sized patties (about ¾ inch thick). Wet your hands slightly to prevent sticking.
- Heat the skillet: Melt butter in a nonstick or cast-iron skillet over medium heat until foaming.
- Cook the patties: Add patties in a single layer, leaving space between them. Cook 3–4 minutes per side until deeply golden and crispy. Reduce heat slightly if the outsides brown too fast before the center sets.
- Optional cheesy finish: Place a slice or extra shredded cheese on each patty and transfer to the oven under the broiler for 30–60 seconds until melted and bubbly—watch closely to avoid burning.
- Serve immediately on toasted bread, English muffins, or plated with sides.
Best ways to enjoy it
Pair these patties with simple sides: a crisp romaine salad with lemon vinaigrette, oven-roasted potatoes, or coleslaw for crunch. For a classic experience, serve on toasted sourdough with a smear of extra mayo or a slice of tomato. If you want an easy sweet finish, a light homemade dessert like this 4-ingredient donut pairs nicely after a savory meal.
Storage and reheating tips
Refrigeration: Cool patties to room temperature, then store airtight for up to 3 days.
Freezing: Freeze cooked patties in a single layer on a tray for 1 hour, then transfer to a freezer bag for up to 2 months. Thaw overnight in the fridge before reheating.
Reheating: Reheat gently in a 350°F oven for 8–10 minutes or in a skillet over low heat to restore crispness. Avoid microwaving if you want to keep them crispy—microwaves make them soggy.
Food safety: Because these contain egg and tuna, keep them refrigerated and discard after 3–4 days to be safe.
Helpful cooking tips
- Use panko breadcrumbs for a lighter, crispier crust; regular breadcrumbs work better if you prefer a firmer, cohesive patty.
- If the mixture seems too wet, add a tablespoon more breadcrumbs; if too dry, stir in a teaspoon of mayo or a splash of milk.
- Don’t overcrowd the skillet — give patties room so they brown properly. Cook in batches if needed.
- For even cooking, press patties slightly flatter than you think; thick patties can brown while remaining cold inside.
- If you like smoky flavor, add 1/4 teaspoon smoked paprika to the seasoning mix. For a fresher edge, fold in chopped parsley or dill right before shaping.
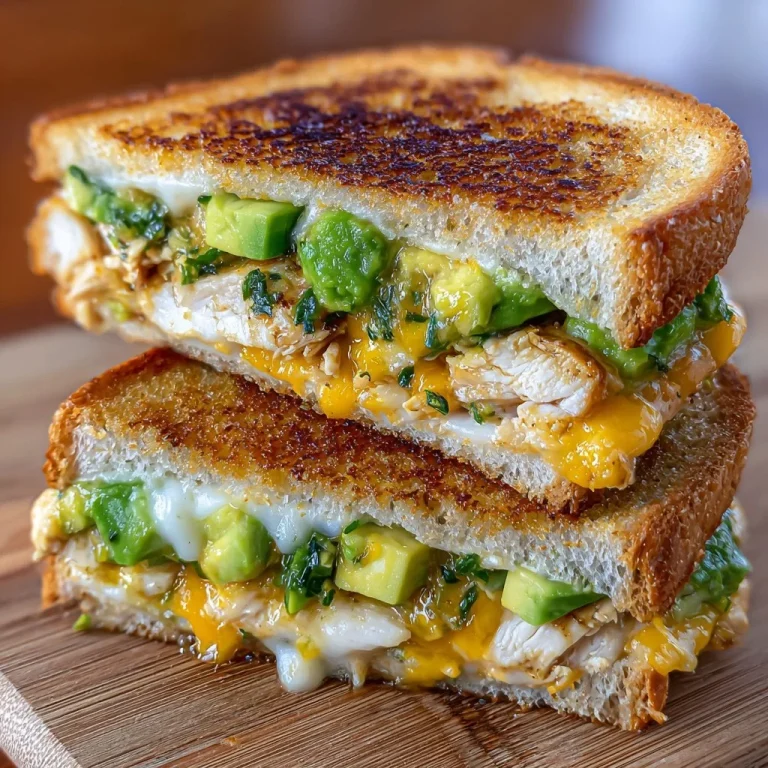
- For a similar hands-on protein trick (binding and browning tips), check my approach in this melt-in-your-mouth chicken recipe.
Creative twists
- Mediterranean: Fold in chopped roasted red peppers, a tablespoon of capers, and use feta instead of cheddar.
- Spicy kick: Add 1 teaspoon Sriracha or 1–2 tablespoons diced jalapeño and swap cheddar for pepper jack.
- Low-carb/Keto: Replace breadcrumbs with crushed pork rinds and skip the bun. (For a dedicated low-carb spin, see a keto-focused version online.)
- Baked option: Arrange patties on a greased sheet and bake at 425°F for 12–15 minutes, flipping once, for a less hands-on method.
- Mini sliders: Make smaller patties and serve as party sliders with pickles and mustard.
Your questions answered
Q: How long does this take from start to finish?
A: About 20–25 minutes total; 10–15 minutes active prep and 6–8 minutes cooking time (plus optional broiling).
Q: Can I use tuna in water versus oil?
A: Yes. Tuna in water is leaner and milder; tuna in oil adds richness. Drain well either way.
Q: Are these safe for kids and pregnant people?
A: Canned tuna is safe in moderation for most people, but pregnant people should follow local guidance on tuna consumption limits due to mercury (typically limiting albacore). Also ensure eggs are fully cooked through (patties should reach a firm texture).
Q: Can I make the mix ahead of time?
A: Yes — mix and shape patties up to 24 hours ahead and refrigerate on a tray covered with plastic. Cook just before serving for best texture.
Conclusion
These tuna melt patties are a fast, satisfying way to transform pantry staples into a crispy, cheesy meal with plenty of room for personalization. For a classic technique and similar flavor inspiration, you might compare this approach with the Easy Tuna Patties Recipe which highlights simple pantry ingredients. If you want a low-carb take or ideas for keto tweaks, check out the Keto Tuna Melt Patties – LowCarb Abode for helpful swaps. Enjoy experimenting — these patties are forgiving and endlessly adaptable.

Tuna Melt Patties
Ingredients
Method
- Open and drain both cans of tuna thoroughly, then flake the tuna into a large mixing bowl.
- Add breadcrumbs, mayonnaise, egg, Dijon mustard, garlic powder, onion powder, salt, and pepper. Mix until evenly combined until the mixture holds together when pressed.
- Fold in shredded cheese and chopped green onions. Stir gently to distribute.
- Form the mixture into 4–5 evenly sized patties (about ¾ inch thick). Wet your hands slightly to prevent sticking.
- Melt butter in a nonstick or cast-iron skillet over medium heat until foaming.
- Add the patties in a single layer, leaving space between them. Cook 3–4 minutes per side until deeply golden and crispy.
- For an optional cheesy finish, place a slice or extra shredded cheese on each patty and transfer to the oven under the broiler for 30–60 seconds until melted and bubbly—watch closely to avoid burning.
- Serve immediately on toasted bread, English muffins, or plated with sides.