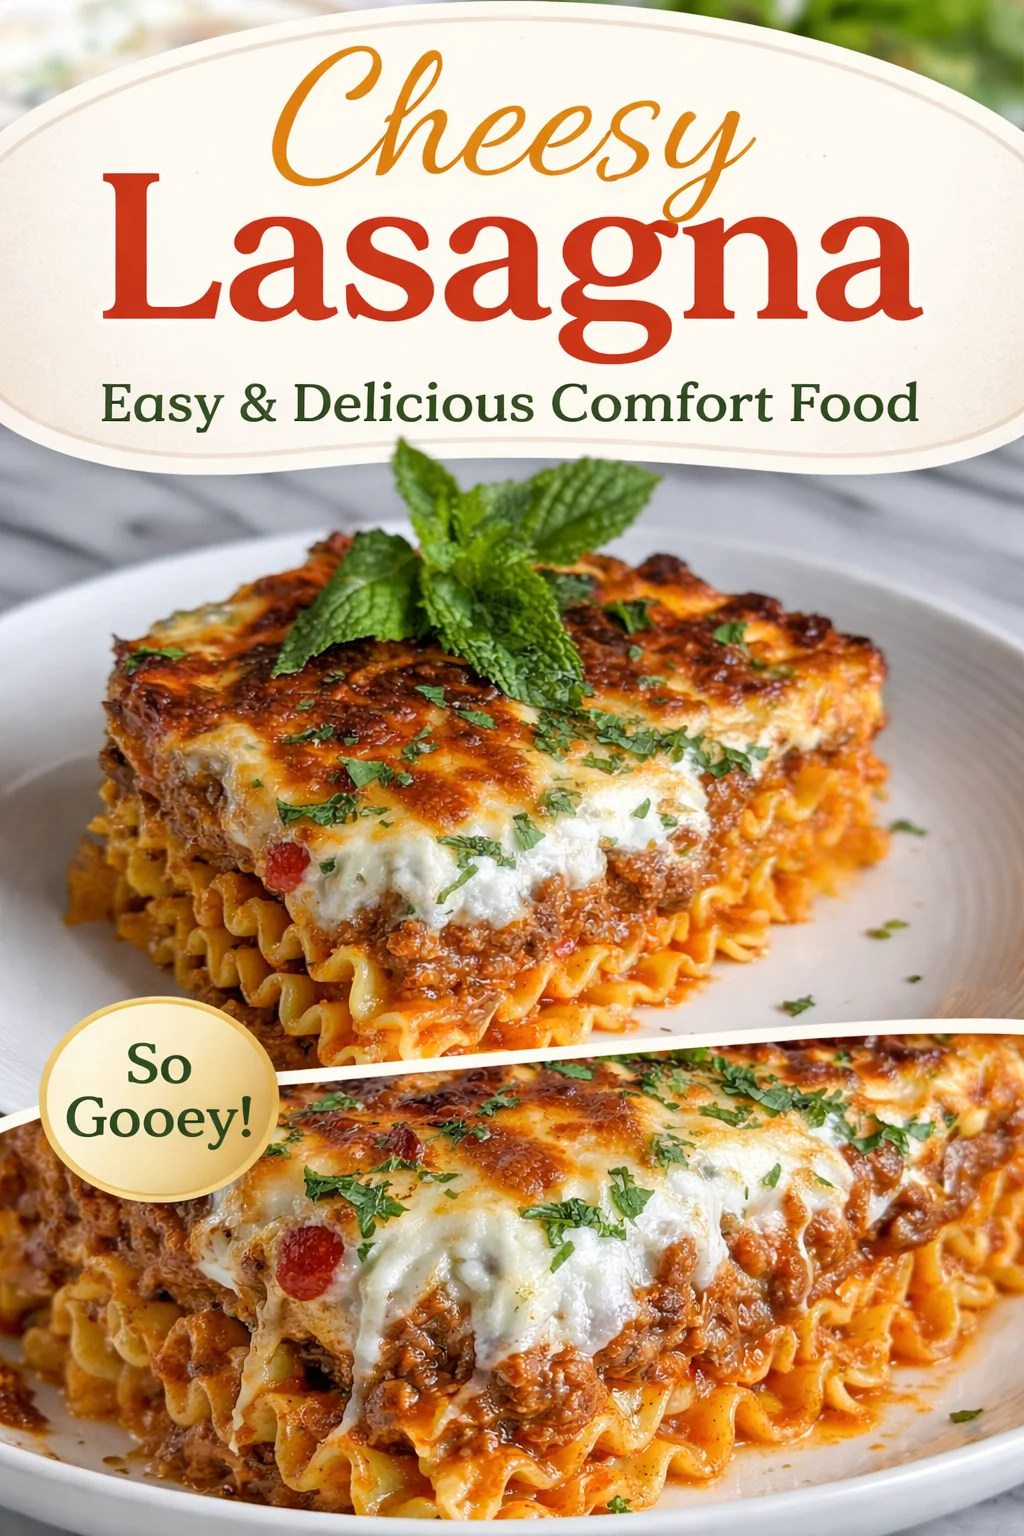
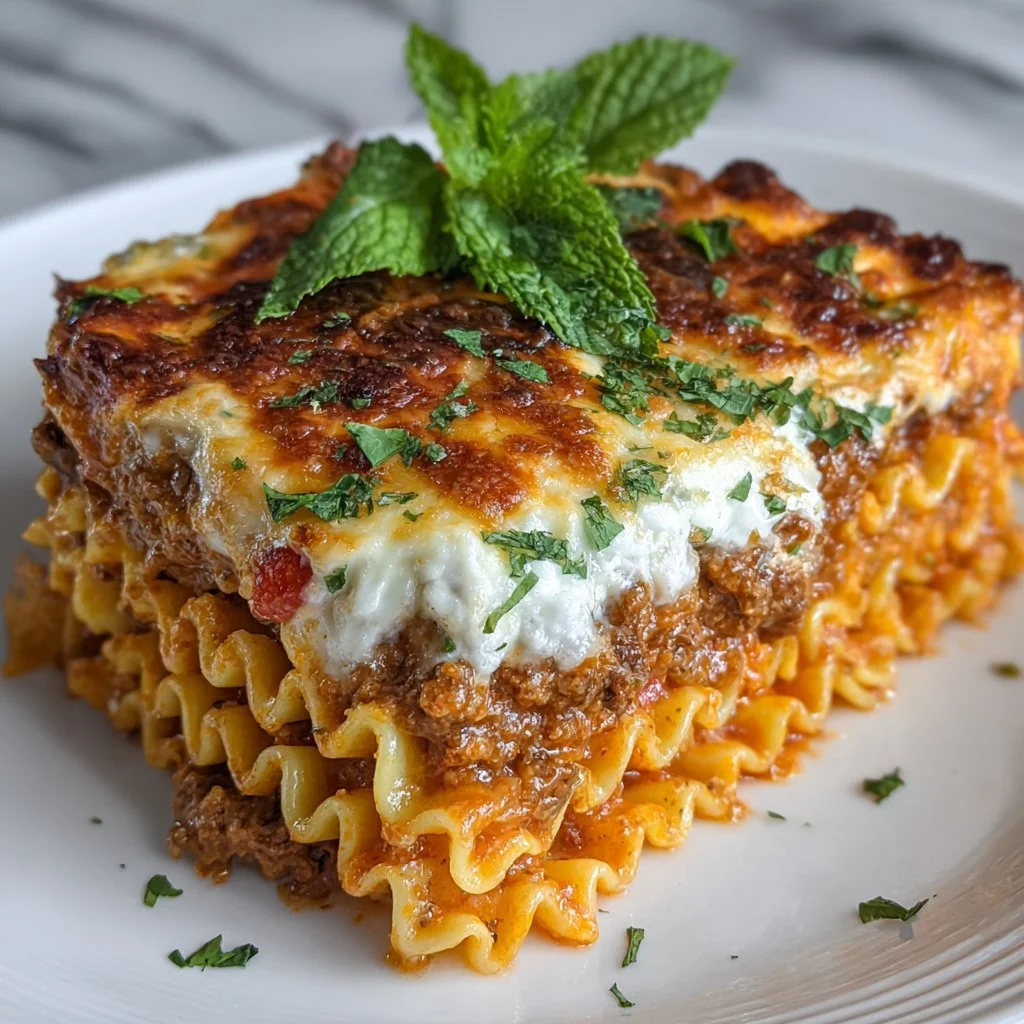
Homemade Gluten-Free Lasagna Noodles

I first made these gluten-free lasagna noodles when I couldn’t find a store-bought sheet that held up in a hearty, cheesy bake. The result surprised me: tender, egg-rich sheets that layer and slice like traditional lasagna without the gummy, fragile texture that sometimes comes with GF pasta. If you avoid gluten or just want a fresher lasagna, this recipe gives you control over thickness, flavor, and hydration — and it’s surprisingly straightforward once you know the little tricks.
I often compare the finished lasagna to a classic one to get the balance right; if you want a reference for a traditional build, see this classic homemade lasagna for assembly ideas.
Why you’ll love this dish
Homemade gluten-free lasagna noodles mean no mystery ingredients and no dry, pre-packaged sheets that fall apart. With just gluten-free 1:1 flour, eggs, and a little water, you make flexible sheets that:
- Hold up under multiple cheese layers.
- Slice cleanly for neat servings.
- Are customizable — thinner for delicate bakes, thicker for rustic, meaty versions.
This recipe shines for weeknight dinners, weekend meal prep, and when you want a lasagna that’s both gluten-free and indulgent. It’s also a great option if you’re serving mixed-diet crowds: regular eaters usually can’t tell the difference in a well-made bake.
“Finally — lasagna that layers like the real thing and doesn’t fall apart. Perfect for family dinners and leftovers.” — a home-cook’s quick review
If you want a vegetarian spin that pairs beautifully with these sheets, check this gluten-free vegetarian lasagna for ideas.
How this recipe comes together
Quick overview so you know what to expect:
- Whisk the eggs and yolks and measure total hydration to 185 g (includes eggs).
- Pulse the gluten-free flour and salt in a food processor.
- With the processor running, drizzle in the egg/water mixture until a cohesive dough forms.
- Knead briefly, rest 20–30 minutes for hydration.
- Cut and pass through a pasta roller, decreasing thickness gradually.
- Trim and cut sheets to fit your pan; optionally parboil 30–45 seconds.
- Assemble your lasagna, reduce added liquid slightly, and bake.
- Rest 10–15 minutes before slicing.
This sets realistic expectations: you’ll spend most time rolling and assembling, with a short resting window for the dough.
What you’ll need
- 300 grams (2 ¼ cups) gluten-free 1:1 flour blend (must include xanthan gum)
- ½ teaspoon table salt
- 2 large whole eggs
- 3 large egg yolks
- Water, measured so the eggs + water total 185 grams (¾ cup total hydration including eggs)
Notes and substitutions:
- If your blend lacks xanthan gum, add 1 teaspoon for structure.
- For dairy-free bakes this noodle still works — it’s egg-based, so it’s naturally dairy-free unless your lasagna filling adds cheese.
- If you want a seasonal twist on fillings that pairs well with these noodles, see this pumpkin homemade lasagna for inspiration.
How to prepare it
- Fit a food processor with the blade. Crack the whole eggs and egg yolks into a bowl and whisk lightly to combine. Measure extra water so that the eggs plus water equal 185 grams total.
- Add the gluten-free flour and salt to the processor. Pulse a few times to mix.
- Turn the processor on and drizzle the egg/water mixture in slowly. Stop once the dough pulls into a soft ball around the blade. If it’s too dry and crumbly, add 1 teaspoon of water at a time until it holds; if too wet, add small pinches of flour.
- Turn the dough out, knead briefly on a lightly floured surface (quick 6–8 turns), then wrap in plastic and let rest 20–30 minutes. Rest allows the flour to hydrate and makes rolling smoother.
- Cut the dough into 3 or 4 pieces. Flatten one piece and start at the widest setting on your pasta roller. Roll each piece, folding once or twice if needed, then pass through progressively thinner settings until you reach your desired thickness — for lasagna, aim for a thin but not translucent sheet (settings vary by machine).
- Trim ragged edges, dust sheets with a little flour to prevent sticking, and cut to the size of your baking dish.
- Optional: parboil sheets for 30–45 seconds in rapidly boiling salted water if you want a firmer, more pillowy texture or if your sauce is not very wet. Drain and layer immediately.
- Assemble with your chosen sauce, cheeses, and fillings. Because these homemade sheets absorb less water than many commercial GF noodles, reduce liquids in very saucy recipes by about 10–15%.
- Bake according to your lasagna recipe, then let the finished lasagna rest 10–15 minutes before slicing so layers set.
For a light dessert after your lasagna, a simple homemade treat like this 4-ingredient donut recipe works great and keeps the menu easy.
Best ways to enjoy it
- Classic pairing: ragù, béchamel, and plenty of grated Parmesan for a traditional bake.
- Vegetables: roasted mushrooms, spinach, or layers of grilled zucchini create a lighter, vegetarian-friendly lasagna.
- Presentation: slice with a sharp knife and use a wide spatula to serve neat rectangles. Garnish with chopped basil or parsley and a drizzle of olive oil.
- Sides: a crisp green salad, garlic-roasted broccolini, or crusty gluten-free bread complement the richness of the lasagna.
How to store & freeze
- Refrigerate: Cool the lasagna to room temperature, then cover tightly and refrigerate for up to 3–4 days. Reheat individual slices in a 350°F oven for 15–20 minutes until warmed through; microwaving works for quick meals but may soften the pasta more.
- Freeze: Freeze fully cooled lasagna in airtight containers or wrapped tightly in foil + plastic for up to 3 months. Thaw overnight in the fridge and reheat in a 350°F oven until heated through (about 45–60 minutes for a whole pan).
- Raw sheets: You can freeze rolled, uncooked sheets flat between parchment for up to 2 months; thaw briefly before assembling. If parboiled and frozen, they’ll still perform well in bakes.
- Food safety: Always cool casseroles to room temperature no longer than 2 hours before refrigerating to avoid bacterial growth.
Pro chef tips
- Hydration matters: Measure eggs and water together. The total 185 g hydration keeps dough pliable — aim for that.
- Rest time is not optional: The 20–30 minute rest hydrates the flour and reduces cracking when rolling.
- Roll gradually: Don’t rush to the thinnest setting in one pass. Multiple passes produce a smoother sheet.
- Dust sparingly: Use gluten-free flour to dust, or fine cornmeal for texture — too much dusting makes layers dry.
- Test one sheet: Before assembling the whole pan, test the first sheet by parboiling or layering to ensure your sauce-to-pasta balance is right. Adjust liquid in the filling if needed.
- Knife for slicing: For clean slices, let the lasagna rest after baking and use a long, sharp knife or serrated spatula.
Creative twists
- Herb-infused dough: Add 1–2 teaspoons of dried Italian herbs or 2 tablespoons of finely chopped fresh basil into the dough for subtle flavor.
- Spinach sheets: Fold in 2 tablespoons of spinach powder or very finely puréed, well-drained cooked spinach to the dough for color and nutrition.
- Beets for color: Replace 1–2 tablespoons of water with beet purée for pink-hued sheets — great for a kid-friendly bake.
- Egg-free option: Swap eggs for a binder like 3 tablespoons aquafaba + extra gluten-free flour and 1 teaspoon psyllium husk; results vary and texture will be more fragile, so parboiling is recommended.
- Mini lasagnas: Cut sheets to smaller squares and make individual portions in ramekins for elegant serving.
Your questions answered
Q: Do I have to parboil the gluten-free sheets?
A: No — parboiling is optional. Parboiling 30–45 seconds gives a slightly firmer, pillowy bite and helps if your sauce is dry. If your sauce is wet or you prefer a softer sheet, you can layer raw.
Q: Can I make these ahead and freeze raw sheets?
A: Yes. Freeze sheets flat between parchment in a single layer, then stack in a freezer bag. Thaw in the fridge before assembling. Parboiled sheets also freeze well.
Q: What’s the best flour blend to use?
A: Use a trusted gluten-free 1:1 blend that already contains xanthan gum. Blends vary — those with rice, potato, and tapioca often work best for structure and mouthfeel.
Q: Why reduce liquid in my lasagna recipe?
A: These homemade noodles absorb less water than some commercial GF noodles, so reducing saucy liquids by about 10–15% prevents a watery bake and ensures layers set well.
Q: Can I make this dairy-free?
A: Yes. The noodles themselves are egg-based and dairy-free; simply use dairy-free cheeses and sauces for the full dish.
Conclusion
Homemade gluten-free lasagna noodles take a little practice, but the payoff is a lasagna that layers and slices like the original — with no gluten and plenty of flavor control. For a step-by-step photo guide and another home cook’s tested method, see this helpful Homemade Gluten-Free Lasagna Noodles Recipe » Easy to Make!, and for more tips on sheet styles and cut pasta, this resource on Gluten-Free Lasagna Sheets or Cut Pasta: Best Gluten-Free Pasta has useful comparisons.
Gluten-Free Lasagna Noodles
Ingredients
Method
- Whisk the eggs and yolks and measure total hydration to 185 g (includes water).
- Pulse the gluten-free flour and salt in a food processor.
- With the processor running, drizzle in the egg/water mixture until a cohesive dough forms.
- Knead briefly, then let rest for 20–30 minutes.
- Cut pieces and roll through a pasta roller, decreasing thickness gradually.
- Trim and cut sheets to fit your pan; optionally parboil for 30–45 seconds.
- Assemble your lasagna with the cooked noodles, sauce, cheeses, and fillings.
- Reduce added liquid slightly in your lasagna recipe.
- Bake as per your lasagna recipe.
- Let it rest for 10–15 minutes before slicing.