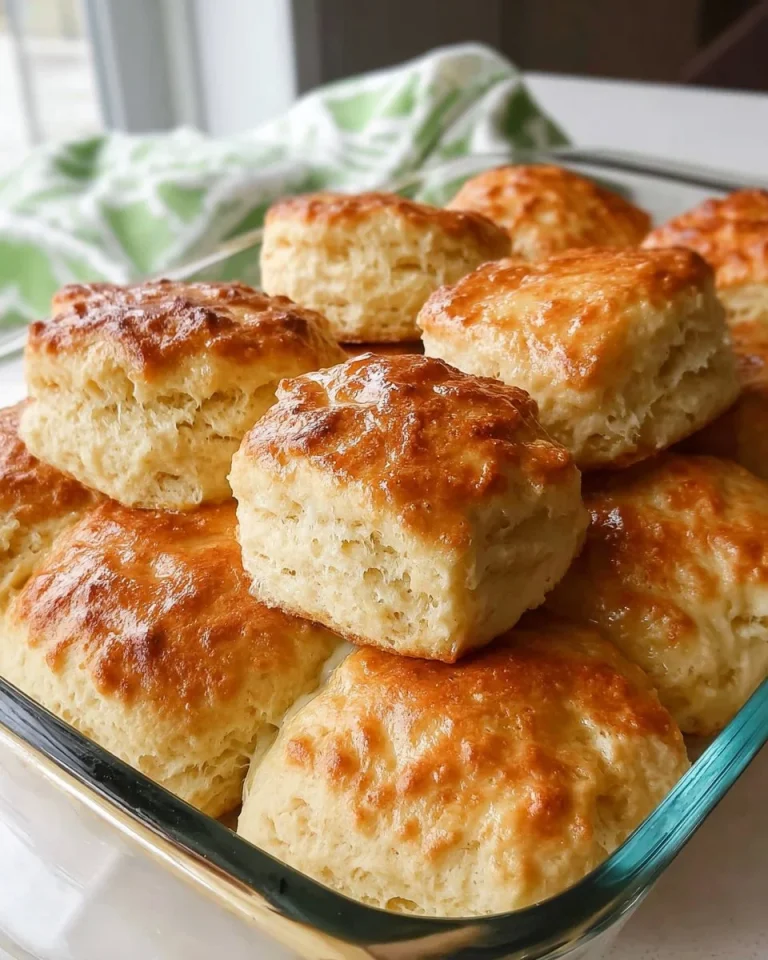
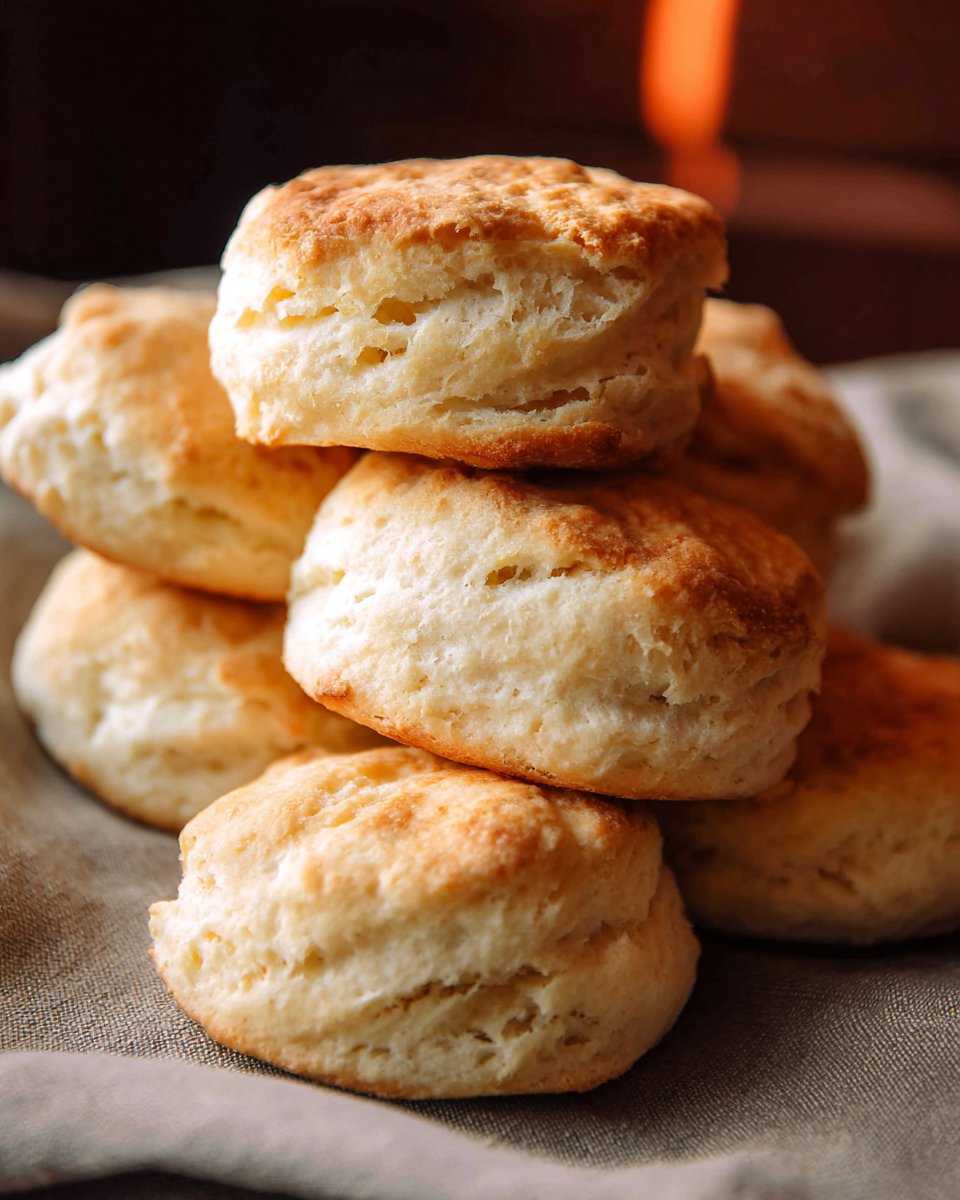
Easy 3 Ingredient Self-Rising Flour Biscuits

I still remember the first time I scraped warm, flaky biscuit layers from a cast-iron skillet — three ingredients, five minutes of hands-on work, and dinner felt homemade again. These easy self-rising flour biscuits are exactly that: quick, buttery, and forgiving. They’re perfect for busy brunches, a last-minute side for weeknight dinners, or anytime you want fresh biscuits without fuss.
What makes this recipe special
This version stands out because it trims the ingredient list without sacrificing texture. Using self-rising flour removes the measuring and combining of leaveners. Freezing the bowl and butter, grating the butter, and preheating a cast-iron skillet all work together to give a crisp exterior and tender, layered interior — the kind of rise that makes biscuits memorable.
“Flaky, tall, and impossibly fast — I make these whenever I want bakery-style biscuits without the wait.”
Benefits at a glance:
- Super simple: only three main ingredients (flour, butter, milk).
- Fast: minimal active time; 15 minutes in the oven.
- Crowd-pleasing: great with jam, gravy, or alongside soups.
- Economical: pantry-friendly staples.
How this recipe comes together
A quick roadmap so you know what to expect:
- Chill tools and butter to keep butter solid until baking — that gives flaky layers.
- Grate the frozen butter into the flour so it distributes evenly without overworking.
- Stir in cold milk just until the dough comes together; it should be lumpy and tacky.
- Fold the dough a few times to create layers, then cut biscuits and bake in a piping-hot cast iron skillet for oven spring and a bronzed crust.
What you’ll need
- 4 cups self-rising flour, plus more for dusting (self-rising already contains baking powder and salt)
- 1 stick (8 tbsp) salted butter, frozen (or 1 stick unsalted + 1/4 tsp salt)
- 2 to 2 1/2 cups cold whole milk or cold buttermilk (buttermilk gives extra tang and tenderness)
- 2 tbsp melted butter (for brushing on top)
- 1 tbsp neutral oil (for greasing the skillet)
Substitutions & notes:
- Milk: whole milk gives best texture; low-fat milk will work but biscuits may be less tender. Buttermilk adds flavor and slightly more rise.
- Flour: don’t substitute all-purpose flour unless you add 2 tsp baking powder + 1/2 tsp salt per cup — self-rising contains those already.
- Butter: keep it cold. You can use frozen butter and a grater, or cut into pea-sized pieces if you prefer.
Step-by-step instructions
- Chill tools: place a large mixing bowl, box grater, biscuit cutter, flour, and butter in the freezer for 15 minutes. This keeps everything cold and helps flakiness.
- Preheat oven: set oven to 425°F (220°C). Put a large cast-iron skillet in the oven to heat while you make dough.
- Combine flour and butter: in the chilled bowl, add 4 cups self-rising flour. Quickly grate the frozen butter straight into the flour. Stir until butter is evenly distributed (small pea-sized pieces are good).
- Add milk: pour in 2 cups cold milk or buttermilk and stir gently until the dough just holds together. Add up to 1/2 cup more milk only if the dough looks too dry. Dough should be lumpy and slightly tacky.
- Shape and layer: turn dough onto a lightly floured surface. Press or pat it out to about 3/4-inch thick. Fold the dough in half, press out, fold again — repeat 2–3 times to build layers.
- Final roll and cut: roll or press the dough smooth back to 3/4-inch thickness. Use a large biscuit cutter and press straight down (don’t twist) to cut 8–10 biscuits. Lift straight up to preserve rise.
- Heat the skillet and arrange: carefully remove the hot cast iron from the oven. Add 1 tbsp oil and swirl to coat bottom and sides. Place biscuits snugly in the skillet so sides touch (for soft sides) or spaced for a crisper exterior.
- Brush and bake: if desired, brush tops with 2 tbsp melted butter. Bake for 15 minutes or until tops are deep golden brown.
- Serve warm: remove from oven, brush again with any remaining melted butter, and serve.
What you’ll need to serve them (Best ways to enjoy it)
- Classic: butter and jam — simple always wins.
- Savory: split and ladle over sausage gravy for biscuits and gravy.
- Breakfast sandwich: add a fried egg, cheese, and bacon or sausage.
- Dinner side: serve with roast chicken, beef stew, or a bowl of chili.
- Plating tip: stack on a warmed plate and cover with a clean towel for 5 minutes to keep them soft before serving.
How to store & freeze
- Room temp: keep leftover biscuits in an airtight container or resealable bag for up to 2 days.
- Refrigerator: store in airtight container for up to 5 days.
- Freezing: cool completely, then wrap individually in plastic wrap and place in a freezer bag for up to 3 months. To reheat from frozen, unwrap and bake at 350°F (175°C) for 12–15 minutes until heated through; brush with butter.
- Reheating fresh: split and microwave at 70% power for 20–30 seconds, then crisp in a 350°F skillet or oven for a few minutes. For best texture, reheat in a 350°F toaster oven or conventional oven.
- Food safety: refrigerate perishable leftovers within 2 hours of baking.
Tricks for success
- Keep everything cold. Cold butter = steam pockets = flaky layers.
- Don’t overwork the dough. Mix until just combined; overmixing develops gluten and toughens biscuits.
- Press — don’t roll — for flakiest layers. Rolling too many times compresses the dough.
- Use a straight-down biscuit cutter action. Twisting seals the edges and prevents proper oven rise.
- Hot skillet tip: placing biscuits into a preheated cast iron pan creates immediate oven spring and a crisper bottom crust.
- If you want taller biscuits, use a smaller cutter so the dough is stacked higher per biscuit.
Creative twists
- Cheesy chive: fold in 1 cup shredded sharp cheddar and 2 tbsp chopped chives into the dough.
- Garlic-herb: add 1 tsp garlic powder and 2 tbsp mixed fresh herbs to the flour; brush tops with garlic butter.
- Sweet honey: replace 2 tbsp of milk with 2 tbsp honey, brush tops with honey butter after baking.
- Gluten-free: try a self-rising gluten-free flour blend designed for baking, but expect slightly different crumb.
- Vegan-ish: use vegan butter and unsweetened plant-based milk; omit the melted butter for glazing or use melted vegan butter.

Your questions answered
Q: Can I make these with all-purpose flour?
A: Not directly. All-purpose lacks baking powder and salt. To convert: add 2 tsp baking powder and 1/2 tsp salt per cup of AP flour.
Q: Why grate frozen butter instead of cutting it?
A: Grating frozen butter creates very small, evenly distributed pieces that stay cold and give more uniform steam pockets for flakier layers.
Q: Can I make the dough ahead?
A: You can assemble the dough and refrigerate it for up to 24 hours. Keep it tightly wrapped; bring back to cold (don’t warm to room temp) before cutting and baking.
Q: What if my biscuits come out flat?
A: Common causes: warm butter/dough, overworking the dough, or twisting the cutter. Ensure butter and tools are cold, handle dough minimally, and press straight down with the cutter.
Q: Is buttermilk necessary?
A: No — whole milk works fine. Buttermilk adds flavor and a slightly tangier crumb and can give a marginally better rise.
Conclusion
These biscuits are a reliable, fast route to flaky, buttery layers with minimal ingredients and fuss. If you want another straightforward take on pantry-friendly biscuits, check out this Homemade Self-Rising Flour Biscuits (Just 3 Ingredients!), or compare technique and tips with the original Easy 3 Ingredient Self-Rising Flour Biscuits (+Video) – Kindly Unspoken. Enjoy warm from the skillet.

Easy Self-Rising Flour Biscuits
Ingredients
Method
- Chill tools: place a large mixing bowl, box grater, biscuit cutter, flour, and butter in the freezer for 15 minutes.
- Preheat oven: set oven to 425°F (220°C) and put a large cast-iron skillet in the oven to heat.
- Combine flour and butter: in the chilled bowl, add 4 cups self-rising flour and grate the frozen butter into the flour. Stir until butter is evenly distributed.
- Add milk: pour in 2 cups cold milk or buttermilk and stir gently until the dough just holds together, adding more milk if necessary to achieve a lumpy and slightly tacky consistency.
- Shape and layer: turn the dough onto a lightly floured surface, press out to about 3/4-inch thick, fold the dough in half, press out, and repeat to create layers.
- Final roll and cut: roll or press back to 3/4-inch thickness and cut 8–10 biscuits using a large biscuit cutter.
- Heat the skillet: carefully remove the hot cast iron from the oven, add 1 tbsp oil, and swirl to coat. Arrange biscuits in the skillet.
- Brush and bake: brush tops with melted butter and bake for 15 minutes or until deep golden brown.
- Serve warm: remove from oven, brush again with melted butter, and serve.