How to Make Fried Onions Recipe
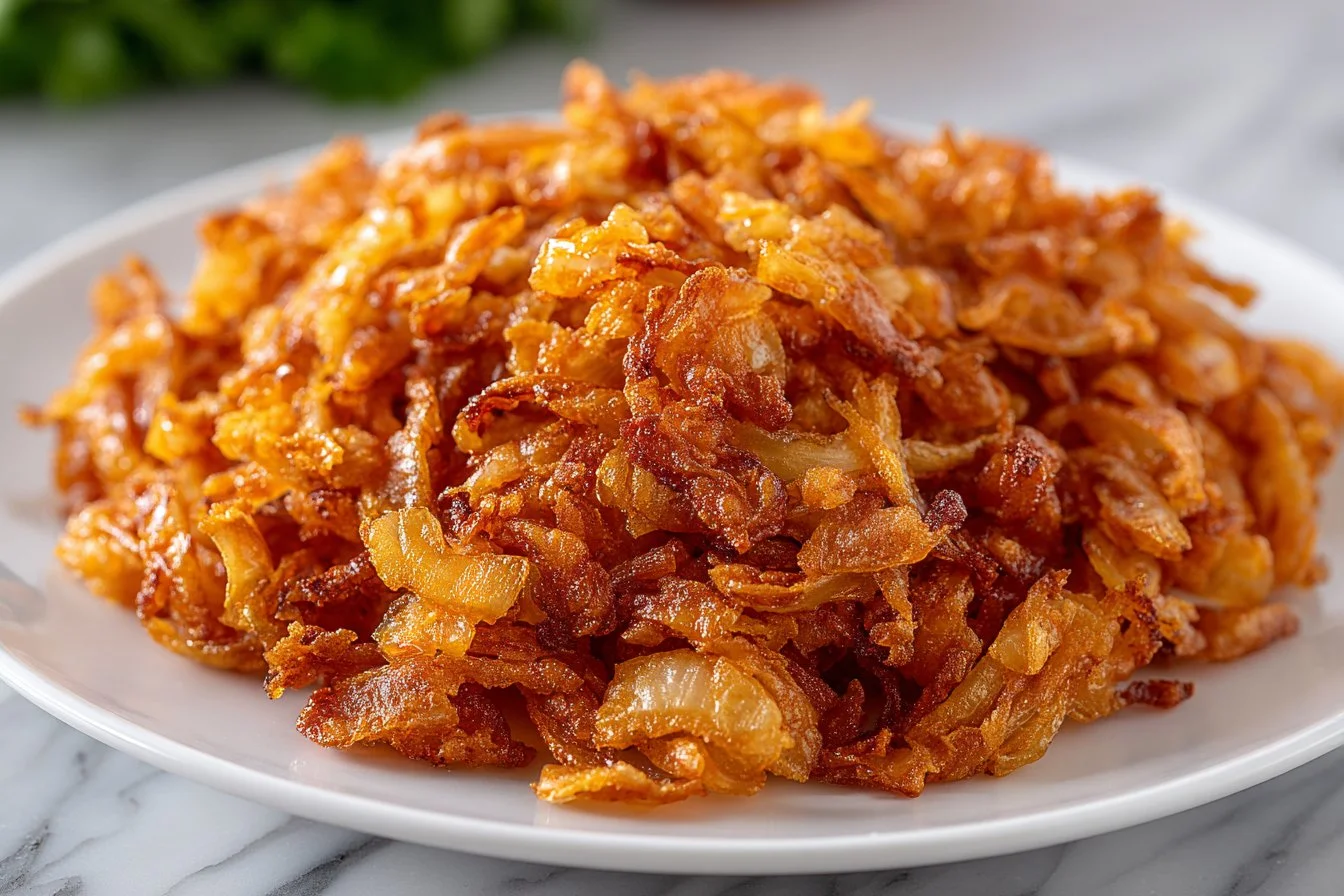
I make a big batch of fried onions every few weeks — they’re the quickest way to upgrade an ordinary meal. Thin, golden, crunchy ribbons add sweet-savory crunch to casseroles, burgers, steaks, or even a bowl of dal. This recipe is simple, fast, and inexpensive, and it teaches a straightforward frying technique you’ll reuse for many other dishes. For a hearty pairing idea, try them atop a slow roast or slow-cooker garlic butter beef bites.
Why you’ll love this dish
Fried onions are a tiny pantry win: minimal ingredients, big payoff. They’re perfect when you want instant texture and deep onion flavor without long caramelizing. Make them for weeknight dinners, to finish holiday casseroles, or to keep on hand for sprinkling over salads or rice.
“These onions delivered that perfect crunchy, savory finish — like the best bit of a good burger, every time.” — home cook review
They’re also budget-friendly and customizable: swap oils, play with seasoning, or double the batch for make-ahead toppings. For a lighter everyday finish, see how similar simple toppings can refresh dishes in this roundup of quick recipes so good, so easy.
How this recipe comes together
Quick overview of the process so you know what to expect:
- Heat oil gently to a low-medium setting so it sizzles but doesn’t smoke.
- Fry onions in two small batches so they brown evenly and crisp.
- Stir occasionally to separate slices and avoid burning.
- Drain and blot on paper towels, then season while hot.
This method focuses on low-and-slow browning to get even, golden-crisp results without bitterness.
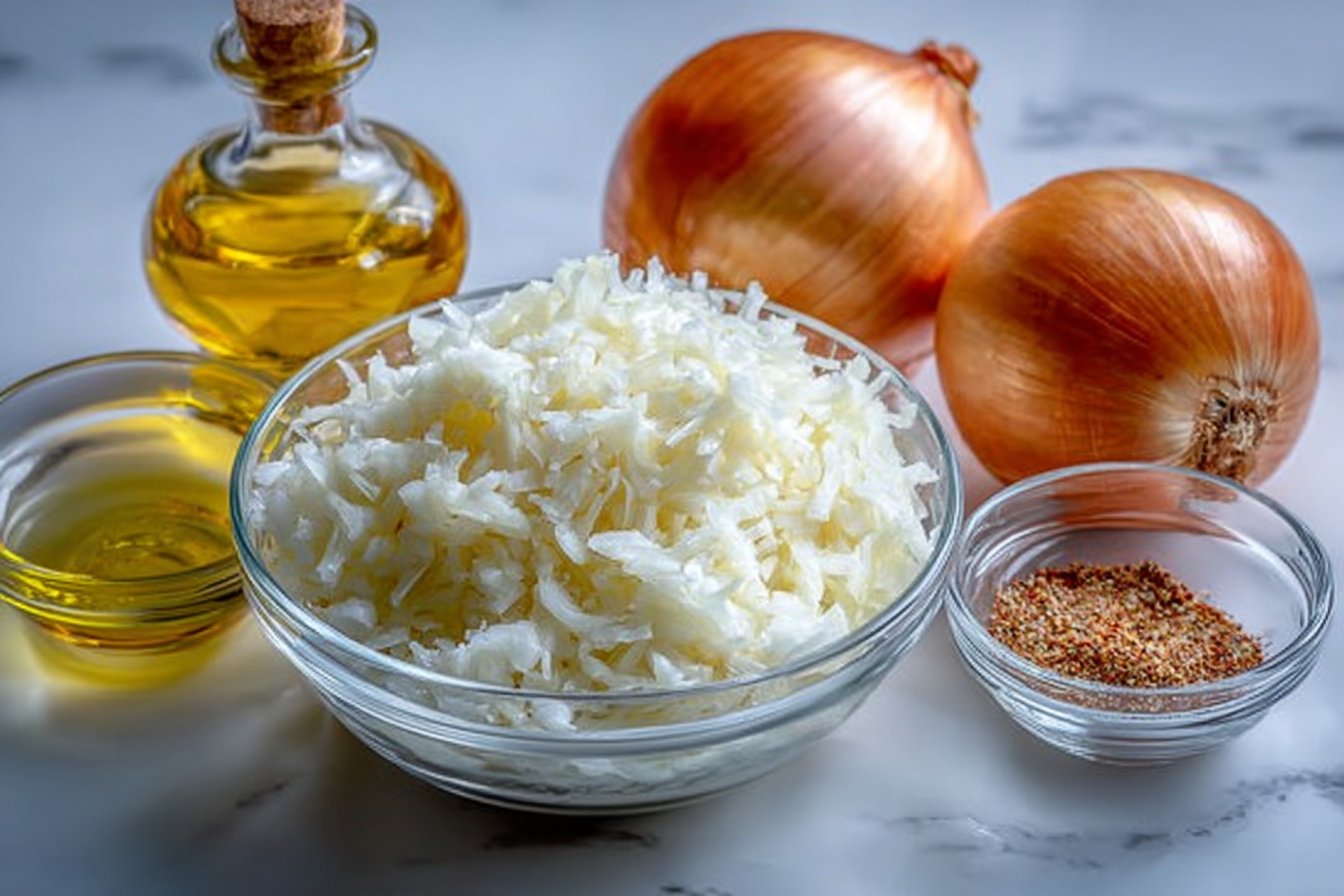
Key ingredients
- 2 medium onions — peeled and sliced thin. Yellow or sweet onions give the best balance of sweetness and browning; white onions work too.
- 2/3 cup vegetable oil — neutral oils like canola, sunflower, or peanut are good choices. Olive oil can impart flavor but smokes sooner.
- Salt and pepper to taste — season right after draining so the salt sticks.
(Notes/substitutions: use ghee for a nuttier flavor, or try avocado oil for higher smoke point. For a gluten-free crunch, these are naturally gluten-free as written.)
Step-by-step instructions
- Pour 2/3 cup vegetable oil into a small saucepan. Warm it over low–medium heat. Keep the flame low enough to avoid splattering and smoking.
- When the oil is ready, test by dropping in one onion slice — it should give a gentle sizzle.
- Add half the onion slices in a single layer (do not overcrowd).
- Cook 7–9 minutes, stirring occasionally to separate slices and encourage even browning. Use a wooden spoon or heatproof spatula to gently move the onions.
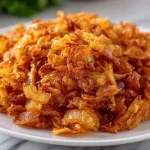
- Once they’re golden brown, transfer the onions to a plate lined with paper towels. Blot lightly to remove excess oil. Immediately sprinkle with salt and pepper.
- Repeat the process with the remaining onion slices.
- Let cool slightly so they crisp further, then serve.
Best ways to enjoy it
- Top burgers, hot dogs, or grilled sandwiches for instant crunch.
- Scatter over casseroles (green bean or creamy potato) for a classic crunchy finish — they’re exactly the kind of topping that makes a dish memorable. Try them on a vegetable bake like a lasagna for contrast: Stouffer’s-style veggie lasagna.
- Use as a finishing crunch on rice bowls, lentils, or biryani (think Indian birista).
- Sprinkle on soups, stews, and salads for texture.
- Pack them into a mason jar and take to picnics — they hold up well for a day.
Storage and reheating tips
- Refrigerator: Store cooled fried onions in an airtight container for up to 4–5 days. They’ll soften slightly but will still add crunch.
- Freezing: Spread cooled onions in a single layer on a baking sheet, freeze until firm, then transfer to a sealed bag for up to 2 months. Re-crisp in a 375°F oven for 3–5 minutes or toast briefly in a skillet.
- Reheating: For best texture, re-crisp on a baking sheet in a preheated oven (350–375°F) for a few minutes or in a dry skillet over medium heat. Avoid microwaving unless you don’t mind soggy results.
- Food safety: Let onions cool slightly before sealing a container to avoid condensation and sogginess. Refrigerate within two hours of cooking.
Pro chef tips
- Don’t rush the heat. Too hot and the edges burn before the slices brown; too low and the onions stew. Aim for gentle sizzling.
- Slice uniformly. A mandoline or a very sharp knife gives thin, even slices that cook at the same rate.
- Fry in small batches. Overcrowding drops oil temperature and causes sogginess.
- Use a slotted spoon to lift onions and let oil drip back into the pan for less waste.
- Season immediately. Salt added while hot adheres better and enhances flavor.
- Save flavored oil. Strain and reuse the leftover oil to cook vegetables or to add onion flavor to other dishes (store in the fridge and use within a week).
Creative twists
- Spiced onions: Add 1/4 teaspoon smoked paprika or curry powder to the salt for a smoky or exotic finish.
- Buttery crunch: Finish the last batch with a tablespoon of melted butter for rich flavor.
- Asian-style: Add a splash of soy sauce and a pinch of sugar in the final minute for caramelized umami notes.
- Sweet-and-savory: Toss with a teaspoon of brown sugar during the last 30 seconds for candied edges.
- Low-oil option: Make in an air fryer at 375°F for 6–9 minutes, shaking halfway (results differ from deep frying but still tasty).

Your questions answered
Q: How long does it take from start to finish?
A: Active frying time is about 15–20 minutes total (7–9 minutes per batch) plus prep (5–10 minutes to slice). Plan for roughly 25–35 minutes end-to-end.
Q: Why did my onions turn soggy instead of crispy?
A: Common causes are overcrowding, oil not hot enough, or cooling in a closed container causing steam. Fry in small batches, maintain low–medium heat, and cool on a rack or paper towels uncovered to keep crisp.
Q: Can I make these ahead for a few days?
A: Yes — store cooled onions in an airtight container in the fridge for up to 4–5 days. Re-crisp in a hot oven or skillet before serving for best texture.
Q: Which onion type is best?
A: Yellow or sweet onions brown nicely and develop a balanced sweetness. White onions crisp well but offer a sharper flavor. Red onions can be used for color but are less sweet when fried.
Q: Is this safe for people watching oil intake?
A: Fried onions are a garnish — a little goes a long way. Use sparingly and consider air-frying for a lower-oil alternative.
Conclusion
If you want more inspiration for crispy onion toppings and variations, this detailed guide to homemade crunchy onions is a great companion: Copycat French’s Fried Onions From Scratch – Served From Scratch. For another method and tips on making birista or crispy onions the Indian way, see: How to Make Fried Onions (Crispy Onions/Birista) – Alphafoodie.
Enjoy making these — once you start keeping fried onions in the fridge, you’ll find excuses to sprinkle them on everything.
Fried Onions
Ingredients
Method
- Pour 2/3 cup vegetable oil into a small saucepan. Warm it over low–medium heat.
- Test the oil by dropping in one onion slice; it should give a gentle sizzle.
- Add half the onion slices in a single layer (do not overcrowd).
- Cook for 7–9 minutes, stirring occasionally to separate slices and encourage even browning.
- Once golden brown, transfer the onions to a plate lined with paper towels. Blot lightly to remove excess oil and sprinkle with salt and pepper.
- Repeat the process with the remaining onion slices.
- Let cool slightly to crisp further, then serve.