Oreo Balls Recipe
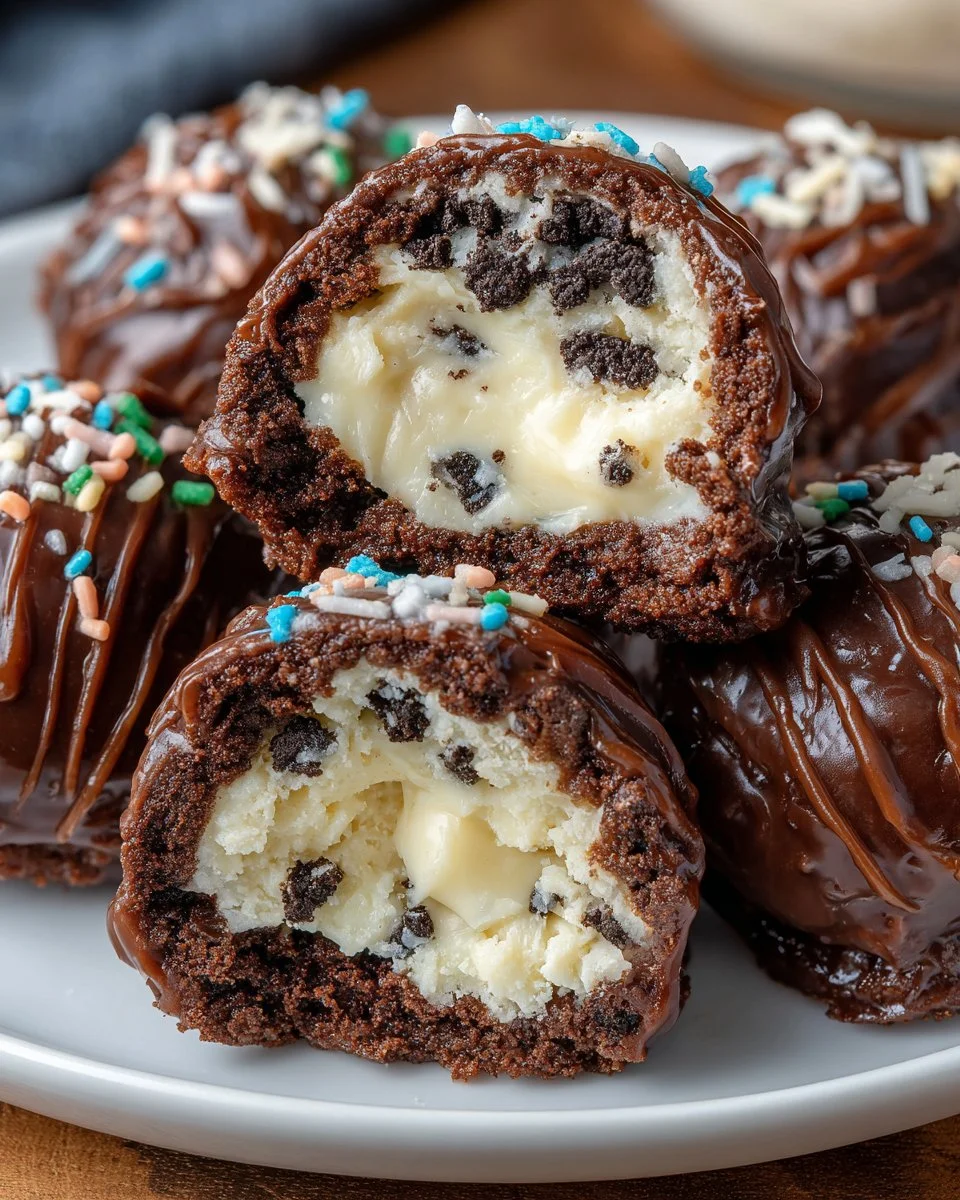
I’ve made Oreo balls for potlucks, last-minute treats, and holidays more times than I can count. They’re quick, kid-approved, and ridiculously satisfying — a no-bake cookie truffle that tastes like a miniature dessert party in every bite. If you want a simple show-stopper that comes together in under an hour, this is it. For another budget-friendly sweet to pair with them, I like keeping a batch of budget-friendly 4-ingredient donuts on hand.
Why you’ll love this dish
Oreo balls are exactly the kind of dessert that checks all the boxes: easy, customizable, and perfect for sharing. They’re great when you need a make-ahead dessert for a bake sale, a simple holiday treat, or a quick party platter. Because they use store-bought cookies as the base, they take almost no baking skill but deliver huge flavor.
“These Oreo truffles vanished in minutes — rich, creamy, and so easy to make. A guaranteed crowd-pleaser.”
They’re also forgiving: swap chocolates, add toppings, or make them gluten-free without changing the technique. If you want a savory-sweet spread for a party, pair with a warm appetizer like these chicken ricotta meatballs for a full table.
How this recipe comes together
Quick overview:
- Grind Oreos into fine crumbs with the filling still inside.
- Add melted butter and a bit of milk to bind the crumbs.
- Shape the mixture into 1-tablespoon balls and chill until firm.
- Dip chilled balls in melted chocolate and let the coating set.
- Store chilled and enjoy.
This sets clear expectations: no baking, a short chill time, and simple dipping. Tools you’ll use: food processor, baking sheet with parchment, microwave or double boiler, and a fork or dipping tool.
What you’ll need
- 30 (340 g) regular or gluten-free Oreo cookies (use the packaged sandwich cookies with filling)
- 3 tablespoons (45 g) unsalted butter, melted and cooled
- 2–5 tablespoons whole milk (start with 2)
- 8 ounces (225 g) dark, semi-sweet, or white chocolate, chopped*
- 1 teaspoon vegetable oil (optional, makes chocolate smoother)**
Notes: Use whole milk for the creamiest texture; evaporated or half-and-half can work in a pinch. If you prefer dairy-free, try a full-fat coconut milk (it will change flavor). 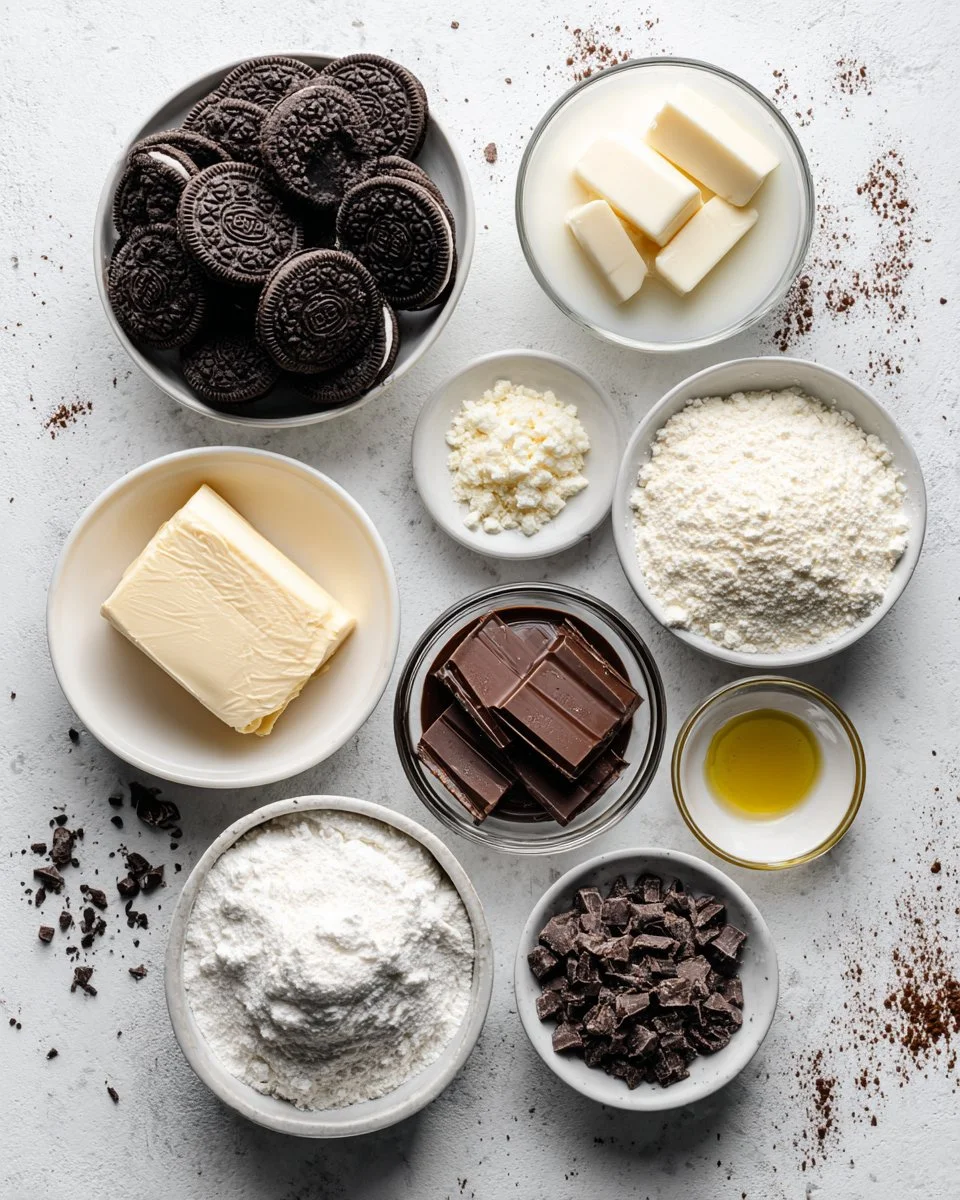
Directions to follow
- Line a medium baking sheet or cutting board with parchment and set aside.
- Place Oreos (filling included) in a food processor. Pulse until the cookies are very fine crumbs.
- Add the melted butter and 2 tablespoons of milk to the crumbs. Pulse until the mixture holds together when squeezed.
- If the mixture is too dry, add milk 1 tablespoon at a time until it sticks without being sticky.
- Scoop rounded 1-tablespoon portions and roll between your palms into smooth balls. Arrange them on the parchment.
- If the mix is crumbly, add a touch more milk. If it’s too sticky, drop the portions on the sheet and freeze 5–10 minutes, then roll.
- Freeze the balls for at least 15 minutes until solid before dipping.
- Melt the chopped chocolate: microwave in 10-second bursts, stirring between each burst, or melt over a double boiler on low heat.
- If using, stir the 1 teaspoon vegetable oil into the melted chocolate and let cool 5 minutes so it’s not too hot.
- Drop a chilled Oreo ball into the chocolate and toss gently to coat. Lift with a fork, tap to remove excess, and place back on the parchment.
- Top immediately with flaky sea salt or crushed Oreo crumbs if desired. Repeat with remaining balls.
- Chill in the fridge or freezer until the chocolate sets. Store in the refrigerator until serving.
Keep steps short and work cleanly: chilled centers dip more cleanly and hot chocolate will melt the truffles if you’re not careful.
Best ways to enjoy it
- Serve on a platter with assorted toppings: crushed Oreos, toasted nuts, sprinkles, or sea salt.
- Add a small paper liner to each ball for a polished look at parties.
- Pair with coffee, espresso, or a glass of cold milk — the bitterness of coffee balances the sweet center.
- Make a dessert board: include fresh berries, shortbread, and these truffles for textural contrast. For hearty mains that complement a sweet ending, try pairing after a plate of slow-cooked beef and broccoli.
How to store & freeze
- Fridge: Store in an airtight container for up to 2 weeks. Keep a sheet of parchment between layers.
- Freezer: Freeze on a tray until solid, then transfer to a freezer-safe bag for up to 3 months. Thaw in the fridge for 1–2 hours before serving.
- Safety: Because these contain dairy and cookies, keep them refrigerated if not serving immediately. Avoid leaving them out at room temperature for more than 2 hours.
Extra advice
- Use a cookie scoop for uniform sizing so all truffles chill and dip evenly.
- Chill in the freezer only until firm; prolonged freezer time makes dipping harder because the center can sweat when warm.
- If your dipped balls develop a whitish sheen (bloom) after freezing, it’s just chocolate fat or sugar migrating — still safe to eat but store them in the fridge for a glossy finish.
- For smoother chocolate coating, do not overheat the chocolate; stir frequently and remove from heat while a few small bits remain, then stir until smooth. I also like browsing a collection of comforting dinner recipes to plan the meal these treats will finish.
Creative twists
- Mint Oreo balls: add 1/4 teaspoon peppermint extract to the binder and dip in dark chocolate.
- Peanut butter core: press a small dollop of peanut butter into the center before rolling.
- White chocolate drizzle: use contrasting chocolate to drizzle after the coating sets.
- Boozy version: add 1–2 teaspoons of liqueur (e.g., Kahlúa or Baileys) to the mixture, reducing milk slightly.
- Allergy swaps: use dairy-free butter and chocolate for vegan-friendly truffles; verify Oreos are acceptable for the diet you’re serving.

Helpful answers
Q: How long does it take to make Oreo balls from start to finish?
A: Active time is about 20–30 minutes; chilling and setting add another 30 minutes to an hour. Expect 45–75 minutes total depending on chilling time.
Q: Can I use a different cookie instead of Oreos?
A: Yes. Any sandwich cookie or sturdy cookie with some filling works (graham crackers plus extra filling aren’t ideal). Flavor will change with the cookie choice.
Q: My mixture is too sticky — how do I fix it?
A: Scoop and freeze portions for 5–10 minutes, then roll. For a future batch, reduce milk slightly and increase crumbs or chill the mixture before shaping.
Q: Do I have to use a food processor?
A: A processor is fastest. You can place cookies in a zip-top bag and crush them with a rolling pin, but make sure crumbs are very fine for a smooth texture.
Conclusion
If you want a tried-and-true no-bake dessert that’s easy to customize and always disappears fast, these Oreo balls are a go-to. For an alternate three-ingredient take and inspiration on different coatings, check this Two Peas & Their Pod Oreo Balls recipe. For another variation and step-by-step photos, see this Preppy Kitchen Easy Oreo Balls (3-Ingredients!).

Oreo Balls
Ingredients
Method
- Line a medium baking sheet or cutting board with parchment and set aside.
- Place Oreos (filling included) in a food processor and pulse until very fine crumbs.
- Add the melted butter and 2 tablespoons of milk to the crumbs, pulsing until the mixture holds together when squeezed.
- If too dry, add milk 1 tablespoon at a time until it sticks without being sticky.
- Scoop rounded 1-tablespoon portions and roll into smooth balls. Arrange on the parchment.
- Freeze the balls for at least 15 minutes until solid before dipping.
- Melt the chopped chocolate using the microwave in 10-second bursts or over a double boiler on low heat.
- If using, stir in the vegetable oil into the melted chocolate and let cool for 5 minutes.
- Drop a chilled Oreo ball into the chocolate, toss gently to coat, lift with a fork, tap to remove excess, and place back on the parchment.
- Top with flaky sea salt or crushed Oreo crumbs if desired.
- Chill until the chocolate sets. Store in the refrigerator until serving.