Peach Cobbler Cheesecake Cones: A Fun, Flavorful, and Portable Dessert Delight

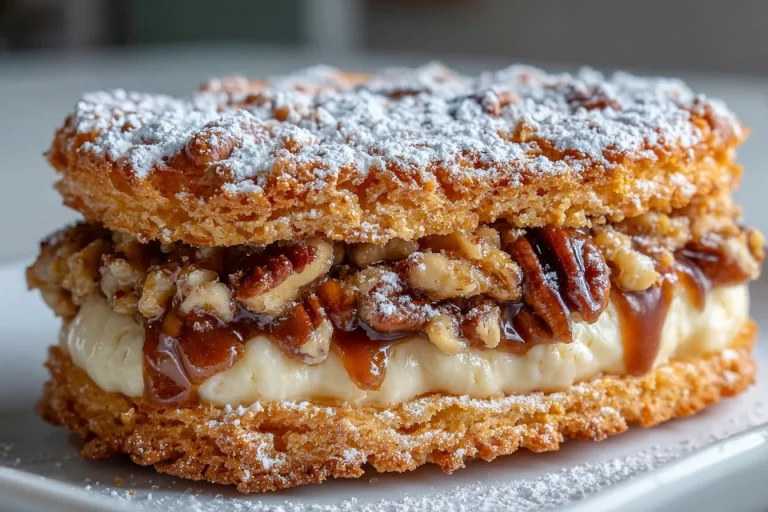
Peach Cobbler Cheesecake Cones are one of those recipes I started making when peaches were at their peak. They’re a playful twist on cobbler and no-bake cheesecake, served in waffle cone bowls for a crunchy, portable finish. They’re great for picnics, summer parties, or when you want a dessert that’s as fun to eat as it is to make.
Why you’ll love this dish
This dessert combines three crowd-pleasing elements: creamy cheesecake filling, warm spiced peach compote, and crisp waffle cones. It’s portable, easy to assemble, and perfect for feeding a group without a lot of plates or forks.
- Kid-approved and party-ready.
- Mostly no-bake, quick prep.
- Flexible—use fresh or canned peaches and swap sweeteners.
- Portable and Instagram-friendly.
“Everyone at the block party kept asking where I got them. Sweet, tangy, and the cone stays crisp—total winner!” — a backyard-testimonial
How this recipe comes together
Step-by-step overview so you know what to expect before you start:
- Make a quick no-bake cheesecake filling with cream cheese, powdered sugar (or substitute), an egg (or pasteurized alternative), vanilla, and diced peaches. Chill.
- Cook a spiced peach compote on the stove. Thicken with cornstarch or arrowroot.
- Seal waffle cone bowls with melted white chocolate so they don’t get soggy.
- Pipe cheesecake into cones, add compote, top with more cheesecake, and garnish.
- Chill briefly and serve cold.
What you’ll need
- 8 oz cream cheese, softened (low-fat OK)
- 1/3 cup powdered sugar or sugar substitute (stevia, erythritol)
- 1 large egg (use pasteurized egg or substitute—see storage/food safety notes)
- 1 tsp vanilla extract (plus 1 tsp for compote)
- 1/2 cup diced peaches (for folding into filling; fresh or canned)
- 2 cups diced peaches (for compote; fresh or canned)
- 1 tbsp lemon juice
- 2 tbsp brown sugar or sugar-free maple syrup
- 1 tbsp cornstarch or arrowroot powder (for thickening compote)
- 1 tsp cinnamon
- 6 waffle cone bowls (or regular waffle cones)
- 1 cup white chocolate chips or melting discs (to seal cones)
- Garnishes: whipped cream, crushed graham crackers, fresh peach slices (optional)
Substitutions/notes:
- If you’re avoiding raw egg, use pasteurized egg, or replace the egg with 1/4 cup Greek yogurt or stabilized whipped cream (for a lighter no-egg filling).
- Arrowroot can replace cornstarch 1:1.
- Use sugar-free syrup or brown sugar depending on dietary needs.
Directions
- Beat cream cheese and powdered sugar (or sweetener) until smooth and fluffy.
- Add the egg and 1 tsp vanilla. Mix until combined.
- Fold in 1/2 cup diced peaches gently. Transfer filling into a piping bag. Chill while you make the compote.
- In a medium saucepan, combine 2 cups diced peaches, lemon juice, brown sugar (or syrup), and 1 tsp vanilla.
- Cook over medium heat for 5–7 minutes until the peaches soften and juices release.
- If you want a thicker compote, whisk cornstarch with 2 tbsp water to make a slurry.
- Stir the slurry into the simmering peaches. Cook 2–3 more minutes until thickened. Add cinnamon, stir, and remove from heat. Let cool slightly.
- Melt white chocolate chips in short bursts in the microwave or in a double boiler. Stir until smooth.
- Spoon or brush a thin coat of melted white chocolate inside each waffle cone bowl to seal. Set cones upright until the chocolate sets (15–20 minutes).
- Pipe a layer of cheesecake filling into each sealed cone bowl.
- Spoon or pipe a generous layer of warm (but not piping hot) peach compote over the filling.
- Pipe another layer of cheesecake to cover the compote.
- Drizzle any remaining melted white chocolate over the top. Add whipped cream, crushed graham crackers, or a fresh peach slice if desired.
- Refrigerate cones for 30 minutes to set. Serve chilled.

How to plate and pair
- Place cones upright in a glass or cone stand for easy serving.
- Garnish each with a small mint sprig and a dusting of cinnamon for a polished look.
- Pair with unsweetened iced tea, vanilla bean ice cream, or a sparkling rosé for adults.
- For a brunch spread, serve alongside mini muffins and fresh berries.
Storage and reheating tips
- Refrigerate assembled cones in an airtight container. They’re best within 24–48 hours. After 48 hours the cones will likely soften.
- Store cheesecake filling and compote separately for best results. Compote keeps up to 1 week in the fridge. Filling keeps 3–4 days if using pasteurized egg or 48 hours with a regular raw egg—safer to use pasteurized eggs if making ahead.
- To freeze: freeze compote and cheesecake filling separately in airtight containers for up to 3 months. Thaw in the fridge overnight. Avoid freezing assembled cones; the texture will degrade.
- Food safety: this recipe includes an uncooked egg in the filling. To reduce risk, use pasteurized eggs or a cooked custard base, or omit the egg and fold in stabilized whipped cream. Keep below 40°F and refrigerate within 2 hours of assembly.
Pro chef tips
- Don’t overmix the cream cheese. Beat just until smooth to avoid a runny filling.
- Cool compote slightly before assembling so it doesn’t melt the filling.
- Use a narrow piping tip to get neat layers in the cones.
- Seal cones with two thin coats of white chocolate for extra protection against sogginess.
- If you only have regular waffle cones, serve immediately after assembling—bowl cones hold the filling better.
- For a glossy chocolate drizzle, add a teaspoon of neutral oil to the melted white chocolate.
Creative twists
- Blueberry-Lemon: swap peaches for blueberries and add lemon zest.
- Peach-Streusel: top with a buttery oat streusel for crunch.
- Boozy Peach: stir 1–2 tbsp bourbon into the compote for adult parties.
- Vegan: use vegan cream cheese, a flax “egg” or aquafaba, vegan chocolate, and dairy-free whipped topping.
- Gluten-free: use certified gluten-free waffle bowls or serve filling in gluten-free pastry cups.

FAQ
Q: Can I make these ahead for a party?
A: Yes—make the filling and compote a day ahead and store them separately in the fridge. Seal the cones with chocolate the morning of the party, then assemble an hour before serving for best texture.
Q: Is the raw egg safe in the cheesecake filling?
A: Raw eggs carry a small risk. Use pasteurized eggs if possible. Alternatively, replace the egg with 1/4 cup Greek yogurt, or fold in stabilized whipped cream for a no-egg filling.
Q: How do I prevent soggy cones?
A: Seal the cone bowls with melted white chocolate (one or two thin coats). Assemble close to serving time if you’re using regular waffle cones.
Q: Can I use canned peaches?
A: Yes—drain them well and pat dry. Reduce added sweetener in the compote if the canned peaches are syrup-packed.
Q: How long will leftovers last?
A: Assembled cones are best within 24–48 hours refrigerated. Unassembled filling and compote last longer—see storage section.
Conclusion
These Peach Cobbler Cheesecake Cones are an easy, show-stopping summer dessert that’s portable and adaptable. For other inventive cone-based desserts and inspiration, check out this Delicious Fruity Pebbles Cheesecake Cone Recipe and this excellent Peach Cobbler Cheesecake Cones Recipe | Perfect Summer Dessert. Both offer useful ideas for presentation and flavor swaps you can borrow for your own batch.

Peach Cobbler Cheesecake Cones
Ingredients
Method
- Beat cream cheese and powdered sugar (or sweetener) until smooth and fluffy.
- Add the egg and 1 tsp vanilla. Mix until combined.
- Fold in 1/2 cup diced peaches gently. Transfer filling into a piping bag. Chill while you make the compote.
- In a medium saucepan, combine 2 cups diced peaches, lemon juice, brown sugar (or syrup), and 1 tsp vanilla.
- Cook over medium heat for 5–7 minutes until the peaches soften and juices release.
- If you want a thicker compote, whisk cornstarch with 2 tbsp water to make a slurry.
- Stir the slurry into the simmering peaches. Cook 2–3 more minutes until thickened. Add cinnamon, stir, and remove from heat. Let cool slightly.
- Melt white chocolate chips in short bursts in the microwave or in a double boiler. Stir until smooth.
- Spoon or brush a thin coat of melted white chocolate inside each waffle cone bowl to seal. Set cones upright until the chocolate sets (15–20 minutes).
- Pipe a layer of cheesecake filling into each sealed cone bowl.
- Spoon or pipe a generous layer of warm (but not piping hot) peach compote over the filling.
- Pipe another layer of cheesecake to cover the compote.
- Drizzle any remaining melted white chocolate over the top. Add whipped cream, crushed graham crackers, or a fresh peach slice if desired.
- Refrigerate cones for 30 minutes to set. Serve chilled.