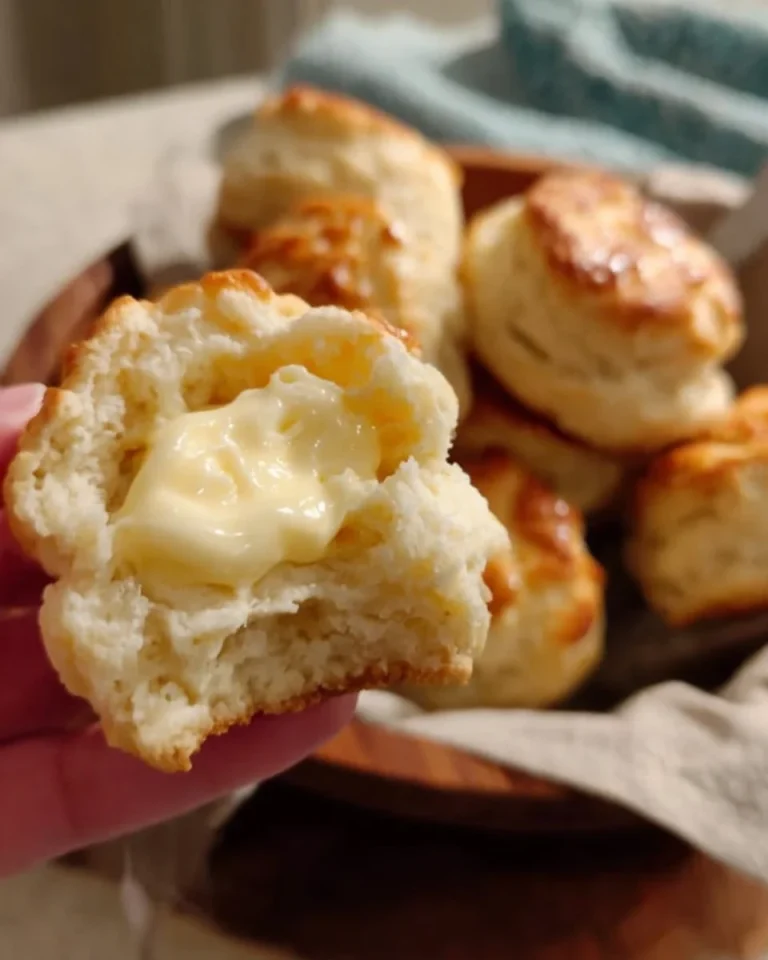
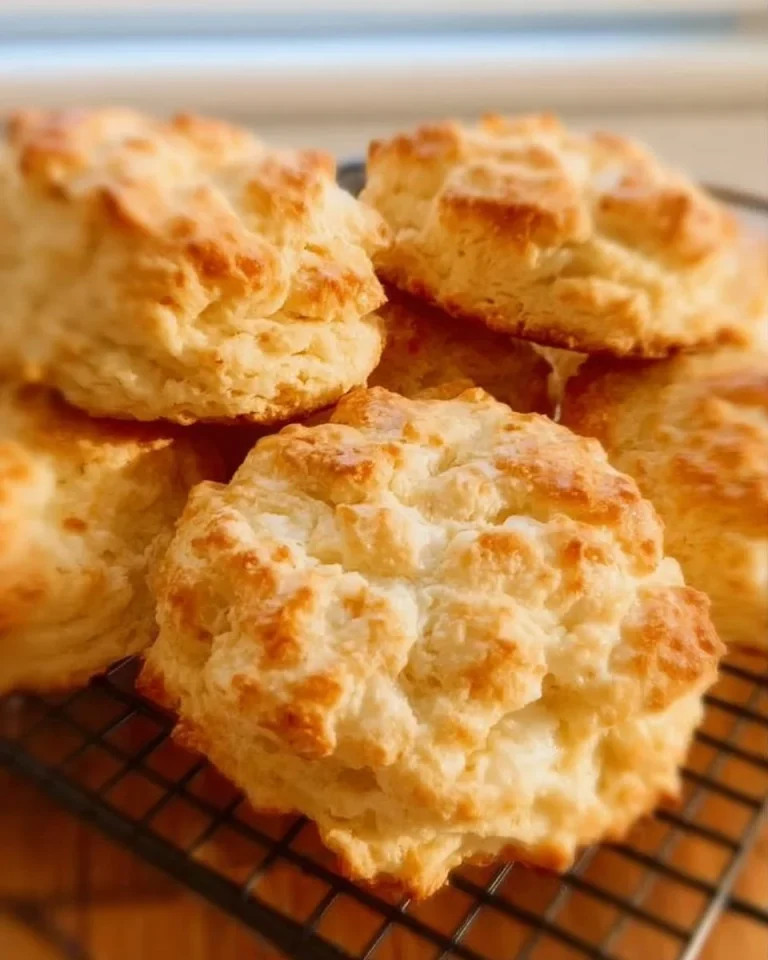
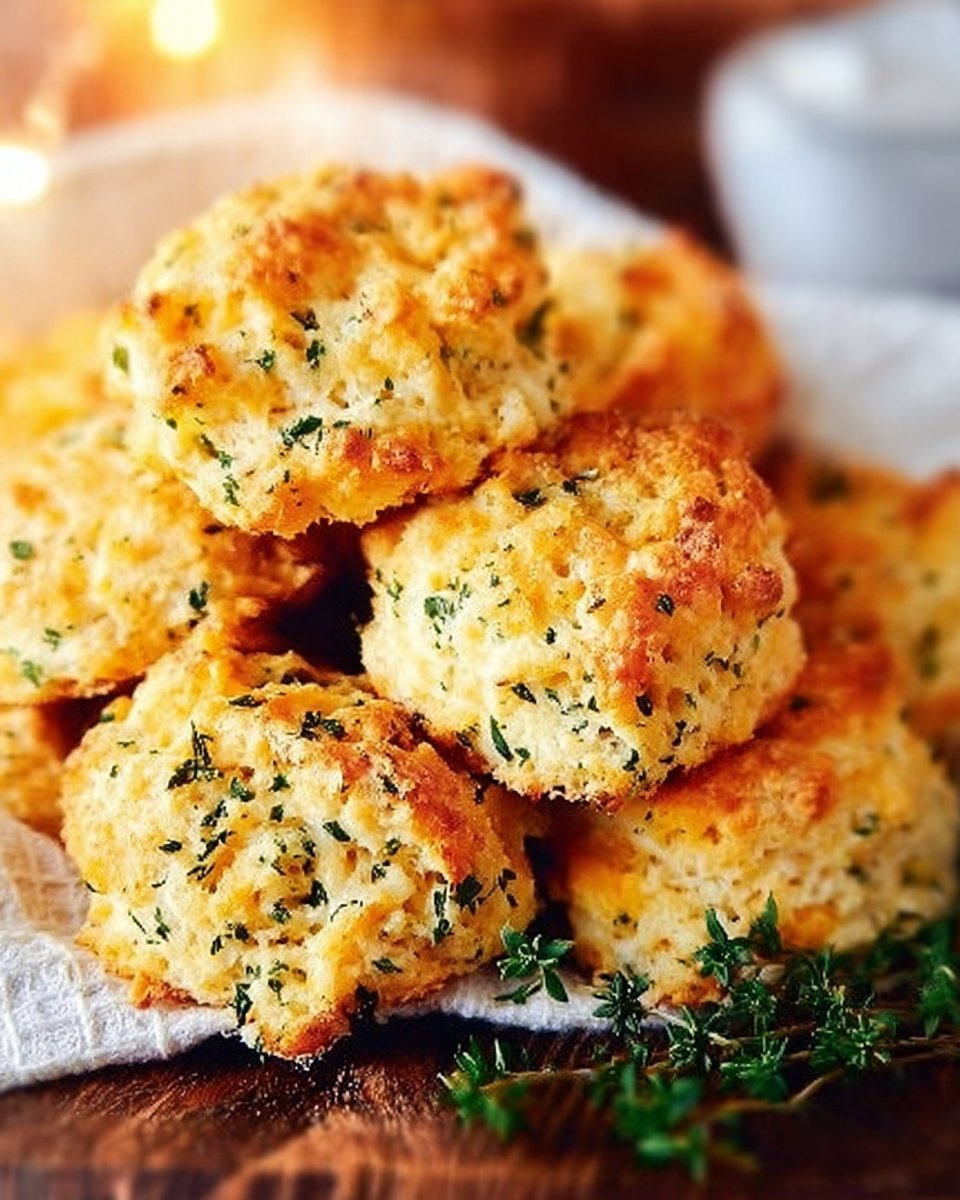
Easy Cheesy Garlic Biscuits

I remember the first time I baked these—warm, flaky rounds with melty cheddar and a buttery garlic finish. These Easy Cheesy Garlic Biscuits are exactly what you want when you need something cozy and quick: a simple dough, sharp cheese, and a garlicky butter glaze that turns plain biscuits into a side everyone asks for seconds of.
Why you’ll love this dish
These biscuits hit the sweet spot between comfort and convenience. They come together in about 25–30 minutes, use pantry staples, and please picky kids and hungry adults alike. They’re perfect alongside weeknight soups, for a family brunch, or to bring to potlucks where they’ll disappear fast.
“Six ingredients, thirty minutes, and everybody’s asking for the recipe—these biscuits are my go-to when guests drop by.” — a fellow home cook
They’re budget-friendly (no fancy cheeses or specialty flours required), forgiving for new bakers, and endlessly adaptable.
The cooking process explained
Quick overview so you know what to expect:
- Preheat oven to 425°F so it’s hot enough for fast oven spring.
- Whisk dry ingredients, cut cold butter in to make a coarse, crumbly texture.
- Stir in shredded cheddar and milk to form a soft dough. Don’t overwork it.
- Drop or cut biscuits, bake 12–15 minutes until golden.
- Melt butter with garlic powder and parsley, brush on hot biscuits for that final glossy, savory finish.
This short roadmap helps you move through the recipe without surprises.
What you’ll need
- 2 cups all-purpose flour (sub: 1:1 gluten-free flour blend for GF; if using self-rising flour, omit baking powder and salt)
- 2 teaspoons baking powder
- 1 teaspoon garlic powder
- 1 teaspoon salt
- 6 tablespoons cold butter, cubed (keep it cold for flaky layers; sub: vegetable shortening for slightly different texture)
- 1½ cups shredded cheddar cheese (sharp cheddar gives more flavor; mix half cheddar/half Monterey Jack for milder taste)
- 1 cup milk (whole milk or 2% best; buttermilk adds tang and tenderness)
- 3 tablespoons butter (for topping)
- ½ teaspoon garlic powder (for topping)
- ½ teaspoon dried parsley (for topping)
Notes: Freshly shredded cheese melts better than pre-shredded (less anti-caking agent). Use cold dairy and work quickly for flakier biscuits.
Step-by-step instructions
- Preheat the oven to 425°F (220°C). Position a rack in the center. Line a baking sheet with parchment or lightly grease it.
- In a large bowl, whisk together the 2 cups all-purpose flour, 2 teaspoons baking powder, 1 teaspoon garlic powder, and 1 teaspoon salt.
- Add the 6 tablespoons cold cubed butter to the dry ingredients. Using a pastry cutter, two knives, or your fingertips, cut the butter into the flour until the mixture resembles coarse crumbs with pea-sized pieces of butter remaining.
- Stir in 1½ cups shredded cheddar cheese so it’s evenly distributed through the dry mixture.
- Pour in 1 cup milk and gently fold until a soft dough forms. Avoid overmixing—stop when the dough just comes together.
- Drop spoonfuls of dough (about 2 tablespoons each) onto the prepared baking sheet for rustic biscuits, or turn the dough onto a floured surface, pat to about 1-inch thick and cut rounds with a biscuit cutter for uniform shapes.
- Bake for 12–15 minutes, or until the biscuits are puffed and golden on top.
- While the biscuits bake, melt 3 tablespoons butter in a small saucepan or microwave-safe bowl. Stir in ½ teaspoon garlic powder and ½ teaspoon dried parsley.
- As soon as the biscuits come out of the oven, brush the garlic-parsley butter over the tops so it soaks in and adds shine and flavor.
- Serve warm.
Best ways to enjoy it
- Serve alongside tomato soup, chili, or creamy chicken pot pie for a comforting meal.
- Use split warm biscuits as a base for breakfast sandwiches with eggs and bacon.
- Pair with a crisp green salad and roasted vegetables for a balanced dinner.
- For a party, lay them out on a platter with small bowls of honey, herb butter, or spicy jam for dipping.
Plating tip: Stack a few on a wooden board and scatter extra shredded cheddar and chopped parsley for a rustic look.
Storage and reheating tips
- Refrigerator: Store cooled biscuits in an airtight container for up to 3 days. Chill within 2 hours of baking.
- Reheating: Reheat wrapped in foil at 300°F (150°C) for 8–10 minutes, or microwave individual biscuits 15–20 seconds (best to crisp them a bit in a toaster oven afterward).
- Freezing: Freeze cooled biscuits in a single layer on a tray until solid, then transfer to a freezer bag or airtight container for up to 3 months. Reheat from frozen in a 350°F oven for 12–15 minutes, covered with foil for the first half to prevent over-browning.
Food safety note: discard leftovers kept at room temperature more than 2 hours.
Pro chef tips
- Keep butter cold: Small cold butter bits create steam pockets as they melt, giving flaky layers.
- Don’t overwork the dough: Overmixing develops gluten and yields tough biscuits.
- Grate your own cheese: Freshly grated cheddar melts more evenly than pre-shredded kinds.
- Space biscuits slightly apart so heat circulates for even browning.
- If you want taller biscuits, use a light hand when pressing/cutting and stack cut biscuits without twisting the cutter.
- Use a metal baking sheet for crisper bottoms; line with parchment for easy cleanup.
Creative twists
- Add-ins: Stir in 2–3 tablespoons chopped chives, cooked crumbled bacon, or a pinch of smoked paprika to the dough.
- Cheese swap: Try Gruyère or smoked cheddar for a different flavor profile.
- Herby lemon: Replace parsley with finely grated lemon zest and fresh thyme for a brighter finish.
- Spicy: Mix ¼ teaspoon cayenne or a pinch of chili flakes into the dough for heat.
- Dairy-free: Use vegan butter and a plant-based shredded cheese, and a non-dairy milk (unsweetened soy or oat works best); texture will differ but still tasty.

Your questions answered
Q: How long does this take from start to finish?
A: About 25–30 minutes total—10 minutes to prep and 12–15 minutes to bake.
Q: Can I use self-rising flour instead of all-purpose flour?
A: Yes. If using self-rising, omit the 2 teaspoons baking powder and 1 teaspoon salt called for in the recipe.
Q: Can I make the dough ahead of time?
A: Yes—mix the dough, shape the biscuits, and store them covered in the refrigerator for up to 24 hours; add a couple of extra minutes to the baking time if they’re chilled.
Q: What if I only have pre-shredded cheese?
A: Pre-shredded works, but freshly shredded cheese melts better because it lacks anti-caking agents.
Q: Can I freeze unbaked biscuits?
A: Absolutely. Freeze them on a tray until firm, then transfer to a bag. Bake from frozen—add a few minutes to the bake time.
Conclusion
If you want a fast, crowd-pleasing side that tastes like you spent hours in the kitchen, these Easy Cheesy Garlic Biscuits deliver. For a slightly fancier homemade version with similar flavors, see the Red Lobster–style approach at Red Lobster Homemade Cheesy Garlic Biscuits – Handle the Heat. For another quick take with helpful step photos, check out Easy Cheesy Garlic Biscuits • Now Cook This!.
Enjoy baking—remember, the garlic butter at the end is what makes these irresistible.

Easy Cheesy Garlic Biscuits
Ingredients
Method
- Preheat the oven to 425°F (220°C) and position a rack in the center.
- Line a baking sheet with parchment or lightly grease it.
- In a large bowl, whisk together the flour, baking powder, garlic powder, and salt.
- Cut in the cold butter until the mixture resembles coarse crumbs with pea-sized pieces of butter remaining.
- Stir in the shredded cheddar cheese until evenly distributed.
- Pour in the milk and gently fold until a soft dough forms. Avoid overmixing.
- Drop spoonfuls of dough or cut into rounds on a floured surface.
- Bake for 12–15 minutes until golden brown.
- Melt the butter and stir in garlic powder and parsley.
- Brush garlic-parsley butter over the biscuits as soon as they come out of the oven.
- Serve warm.